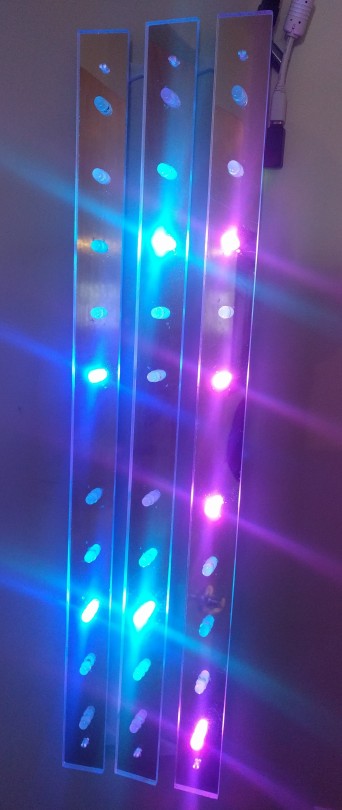
This project is designed to answer the question “if I leave my house now, how long will I have to wait for my subway train?” One way to answer that question is “if you leave right now you won’t have to wait at all”.
The project uses a raspberry pi zero to connect the NYC MTA real time arrival data with neopixels. The neopixels give you an indication of how far trains are away from the station. Importantly, the alerts are not based on the absolute time until the train arrives at the station (”A train will arrive at the station in 5 minutes”). Instead, the alerts are aware of how long it takes to walk to the station from my apartment and are therefore based on the time from the station when you get there (”If you leave now and walk to the station, there will be a train arriving in the station 5 minutes after you get there.”).
A few quick notes before getting into the details. First, the way you arrange the indicator lights is essentially arbitrary. We happened to abstract them out into strips. However, you could do spirals or overlay them on a map or whatever you want. Second, and speaking of maps, this project builds on the never quite finished metro-and-bikeshare map project from when I lived in DC. That one combines reading from the WMATA api and the DC bikeshare API with an eye towards lights integrated into a map. If you are in DC it may or may not be helpful for you. Third, the parts of this that parse the MTA’s API is 100% reliant on Chris Griffin’s real time countdown subway display. The NYC subway API is more robust than DC’s, which means it is like a million times harder to parse if you (like me) don’t know what you are doing. Chris’ code made everything a lot easier.
The basic outline of the project is as follows:
- Poll the MTA API to find out when trains will arrive at your station
- Pull out the trains you care about
- Assign them to the relevant indicator lights
- Repeat
Bill of Materials
- Rasbperry Pi Zero W (you’ll need a power supply too)
- Neopixels (however many lights you want)
- Diodes (you only need one)
- 0.1uF capacitors (I used 1 for ever 4 neopixels)
- 4700uF capacitor
- Female DC power adapter
- Wires
- Some sort of pushbutton (if you want the pause feature)
If you decide to go with the physical layout I used you will also need
- Mirrored acrylic (I got mind at Canal Plastics)
- The brackets (available in the repo and on thingiverse)
Software
I’m assuming you already have your pi connected to your home network to get this rolling. One thing that I did discover is that you can transfer an SD card from a regular pi to a pi zero. That allowed me to prototype this entire thing on a full sized pi (with headers) before shifting it onto the zero.
Tumblr is bad at formatting code so I’ll just point to the github repo here for the entire code. I’ll use this section to walk through important parts of the code.
#variables to hold the lists
arrival_times_york_south = []
arrival_times_york_north = []
arrival_times_high_south_a = []
arrival_times_high_north_a = []
arrival_times_high_south_c = []
arrival_times_high_north_c = []
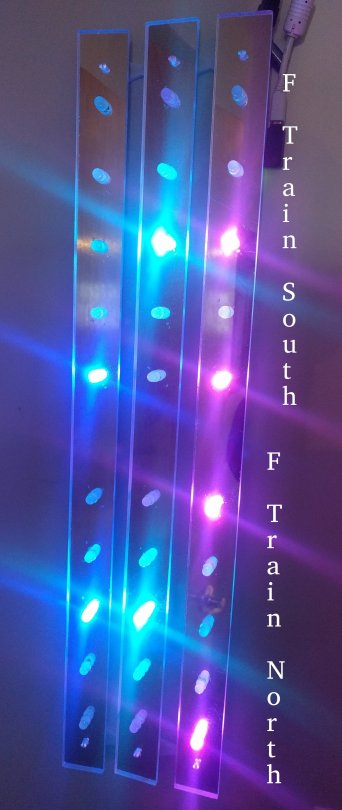
This section creates the station lists. For my purposes I care about three stations: York, High Street (A line), and High Street (C line). Each station has two directions. Modify these as relevant for the stations you care about.
#variables to hold the station IDs
HighS = [‘A40S’]
HighN = ['A40N’]
YorkS = ['F18S’]
YorkN = ['F18N’]
These hold the UIDs for the stations within the MTA API. Someone made a helpful heroku app to help you find the ids that you care about.
#variables to hold the walk times
HighWalk = 13
YorkWalk = 7
This is how long it takes you to walk to the station. This is used to customize the alert time for your location.
def grabber(station_ID, station_URL, station_line):
This function adds the arrival times to the station for every train that is in they system. Since the MTA API has data for when every train running will reach every station, the output here can be a dozen or so numbers that are as high as 60 minutes out.
def lighter(arrival_list, time_start, light_one, light_two, light_three, light_four, light_five, line_R, line_G, line_B):
This function decides which of the neopixels to turn on. “arrival_list” is the output from grabber, “time_start” will be how long it takes to walk to the station, the “light_x” is the the neopixels associated with that station in that direction, and “line_X” are the RGB colors associated with the line. The idea here is that you tell the function when trains are coming, how to correct those arrival times for you walking to the station, what the indicator lights are, and what color they should be when they are on.
The block of if statements in this function that start with
if int(item) == time_start:
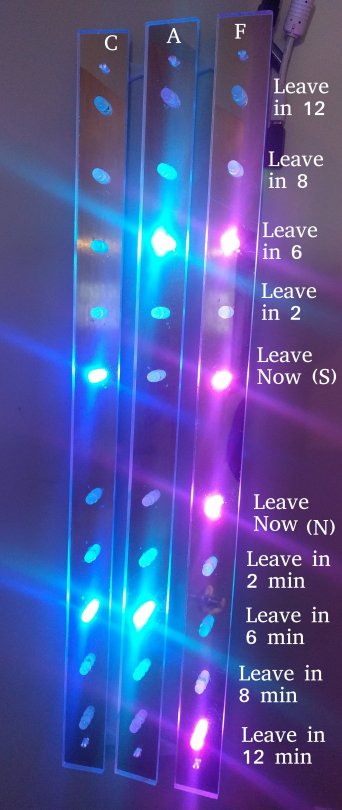
decide what these lights mean. I decided to make five lights for each direction. They are:
- leave now
- 1-2 minutes until leave now
- 3-4 minutes until leave now
- 5-7 minutes until leave now
- 8-12 minutes until leave now
These are relatively arbitrary categories can you can change them so that they work for you. As noted above, the basic idea is to get a sense of how long you have until you need to leave and how many trains are coming reasonably soon. Note that the lights can’t tell the difference between 1 train being in a category and 2 or more trains being in that category. Also, I suppose this is where I should mention that these lights are only as accurate as the MTA info they are based on.
def blackout():
This function turns off the lights at night. It has slightly different times for weekdays and weekends.
def pause_button(channel):
This function is for a pause button that temporarily turns off the lights during a time when they would otherwise be on. I don’t know if I’m going to use it (as of this moment the off time is set to 30 seconds) but if the lights are somewhere that you’ll want to be able to shut them off for random reasons this allows you to do so.
while True:
Having built these functions, this loop actually runs them. It ends by pausing for 5 seconds. This is a shorter amount of time than necessary and was originally 30 seconds (this probably doesn’t need to be updated more than once a minute). However, I’ve found that the actual downloading and parsing of the MTA data can take 15-20 seconds (sometimes even more) so I shortened it to 5 seconds.
Hardware
Here’s the wiring diagram:

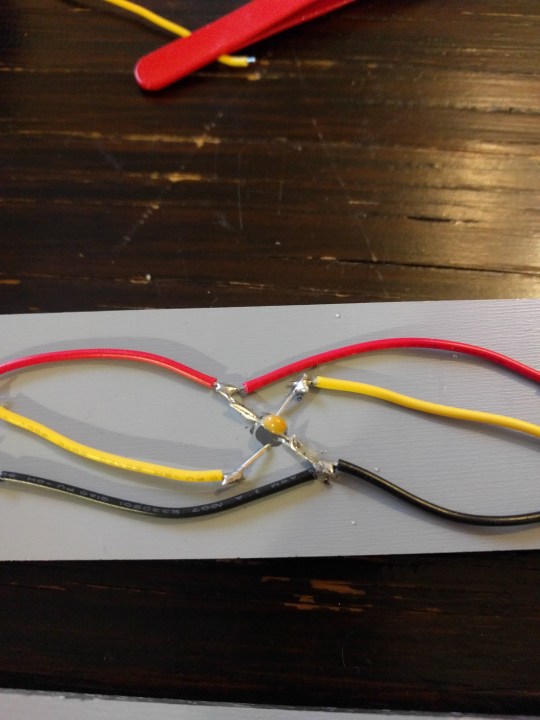
I ended up putting the diodes every fourth neopixel.
After drilling the holes in the acrylic sheet I put the neopixel through the hole and soldered in the wires:
Here’s an image of all of them chained together:
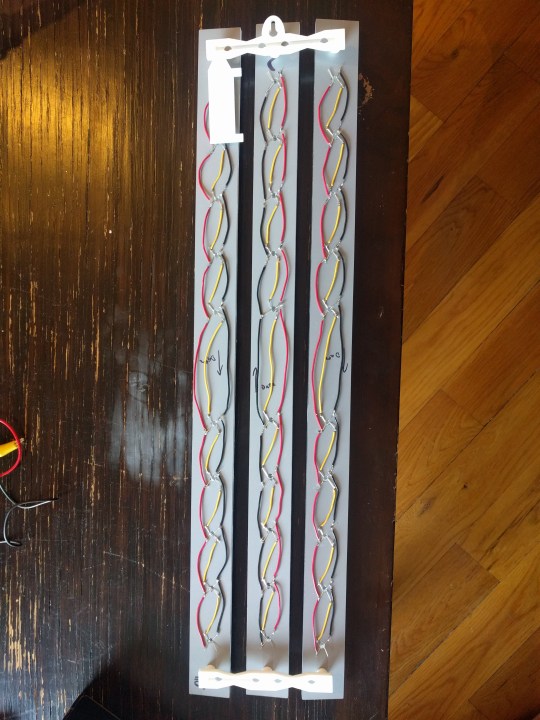
Wired together with the harness:
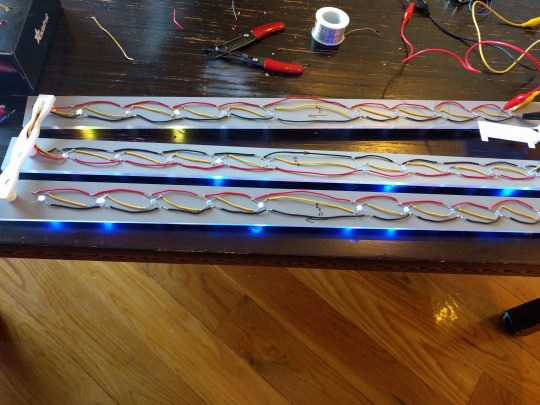
And soldered in with the pi:

And that’s more or less it. Once you have things connected to your network just pick a place to hag it up. Now you may or may not be late to a subway train again, depending on the accuracy of the MTA API data.