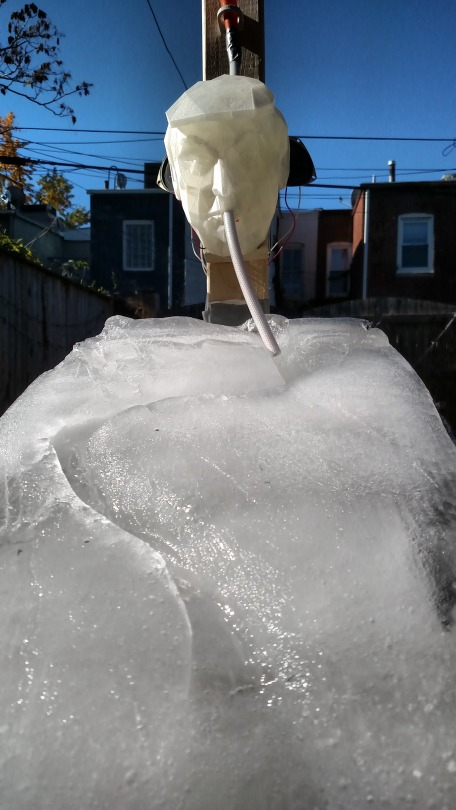
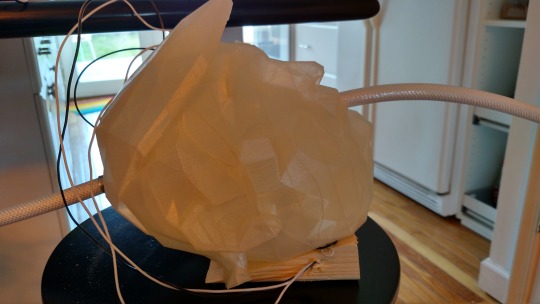
Technically you can use this setup to make any kind of interactive ice luge. But I used it to make a Trump head ice luge, so that’s what this post is about. To be clear, when I say “Trump head ice luge”, I really mean, “Trump head spout on an ice luge”. This isn’t a giant block of ice shaped like a head.
The central principle here is fairly straightforward. There is a sensor that detects fluid. When it detects fluid, it triggers 1) a
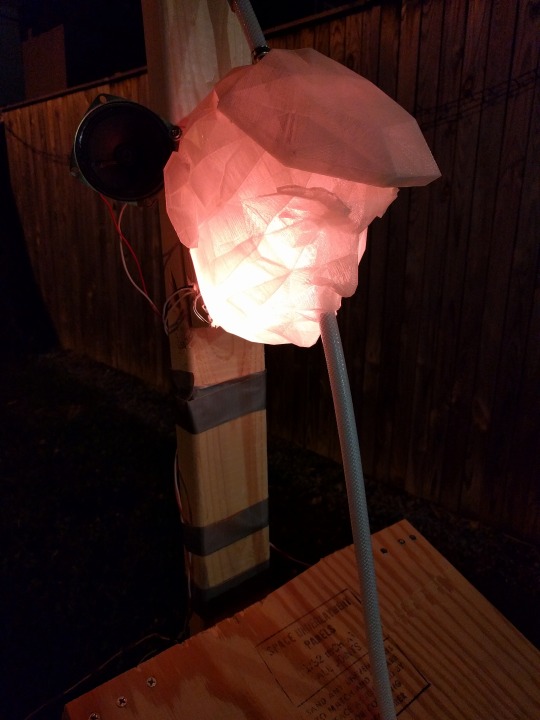
random audio clip, and 2) a change in light color while the clip is playing. My version played one of 45 random Trump clips and turned the lighting from the default orange to red for the duration of the clip.
Bill of Materials
- Wood and screws for the rack (I used some 2x4s and
plywood)
- Lots of cardboard, newspaper, and trash bags (for the ice,
more on this below)
- 1 Arduino
- 1 Adafruit Music Maker Shield
- Tubing that mates with the flow meter (I just took the meter to the hardware store and wandered around the plumbing area until I found something that worked.)
- Funnel
- Clip
- 2 speakers
- Hot glue gun
- 4 NeoPixel Diffused 8mm Through-Hole LEDs
- A 3D printed head
- Wires and a power supply for the arduino.
- Audio clips
Making the Ice
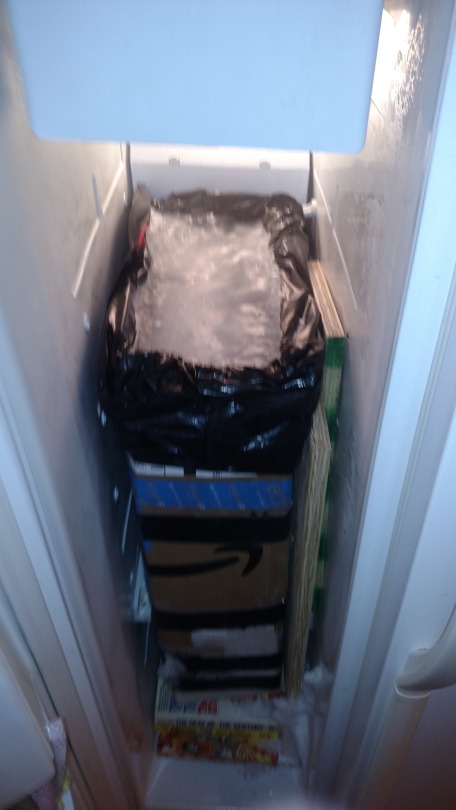
This is going to take longer than you think. Clear out space in your freezer and make a
cardboard box that will fit. The box
will expand a bit with the ice, so make sure there isn’t anything built into
the freezer wall (say, posts to hold racks) before sizing the box. The box here was 2 pieces of cardboard thick
and then wrapped in tape. It was about 7 inches by 14 inches by 27 inches when all ways said and done.
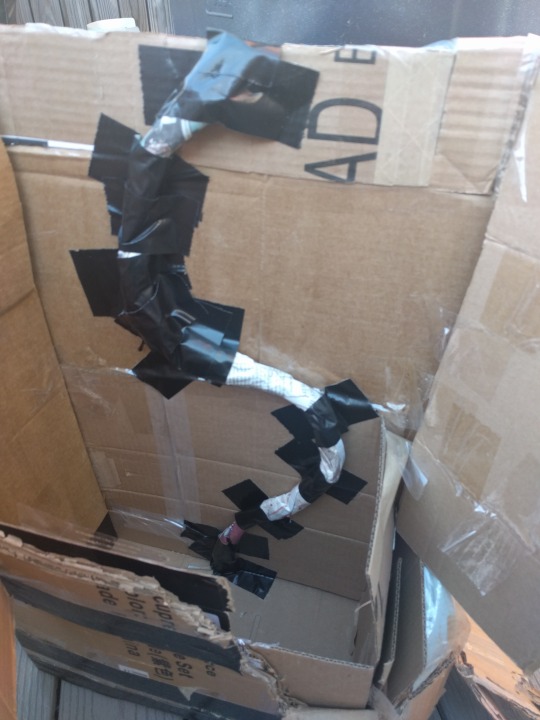
Roll up the newspaper tightly. Use the resulting tubes to build a track into the inside of the box by taping the tube to the wall of the box. This will create the channel in the ice luge.
Next line the box with heavy duty garbage bags. Once you have done that, you can start filling up the box with water. Depending on the size of your block, expect this to take at least a week. A few tips:
- Chill the water before adding it to the box
- If possible, create a large block (still smaller than the one you want to make) of ice to seed
your full block of ice. Put it in the
box and then fill the box with water until the block floats.
The water in the middle freezes last, so if that water is already ice
things will go faster. Plus the floating ice will suggest that you are creating enough outward pressure on the walls to get a nice groove.
- When water freezes, the ice floats to the top. That means that even if the ice at the top of
the box is solid, there is likely still water at the bottom/in the interior.
- Add enough water to push up against the walls of the
box. That will make sure that your
channel is deep when you pull it out.
- It will take longer to freeze than you think. Turn your freezer down as low as possible.
Eventually, if you are lucky and patient, you will have a
block of ice. When it is time to use the ice, just cut away the box and pull off the trash bags. It is likely that bits of bag will be frozen into the block. If you are lucky there aren’t that many.
Making the Head
Fortunately I did not have to model the head myself. Thingiverse user digitalcoleman had already
created a low poly Trump head and
licensed it under a CC-BY license. I
downloaded it and used tinkercad to create the voids for the tubes, meter, and
LEDs. You can download my version here.
If I had to do it again, I would have created shallow
channels in the bottom connecting the spaces for the LEDs. That would make it easier to connect them
with the wires.
Note that if you print the model at scale it is a really
long print. Fortunately Andy at Open
Factory hooked me up and printed it for me.
Also note that printing it in a clear material makes the LEDs work much
better.
The Code
You can download the code here (it’s final.ino.ino). As noted in the
header, I got a lot of help for it in the adafruit forums. Hopefully the comments are enough to help you
figure out how it works. If you are using everything I used, it should just work. It should also be easy to find the lines to change the colors if that’s your thing.
You will also need to get your audio clips together. I had about 45. Label them as track001.mp3, track002.mp3, and
so on and put them on the SD card.
(There is no link to this on the musicmaker page, but here’s the
tutorial
for the shield). The software will
randomly pick a track to play every time. It will also know how many tracks there are, so you don’t need to worry about setting that variable in the code or anything.
Putting it Together
Here’s a wiring diagram (it only shows 2 LEDs but my final had 4)(also, when you are wiring the LEDs I had the flat side facing to the right):
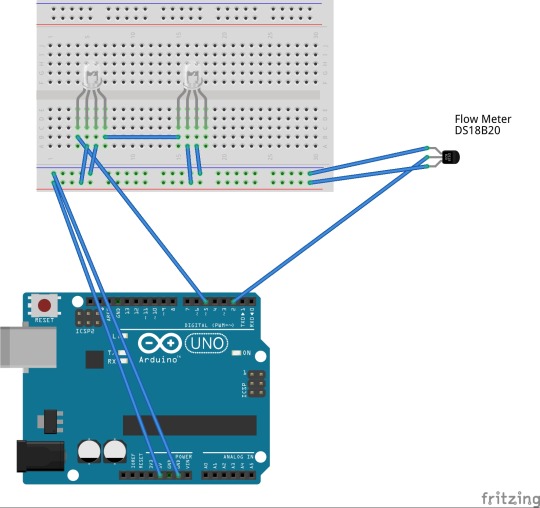
I used a hot glue gun to glue the 4 neopixels into the voids
at the bottom and then soldered them together.
You can see how having channels between the holes would have helped
here. The fifth and sixth hole are for the mounting screws.


The wiring for the sensor can sneak out the back of the head
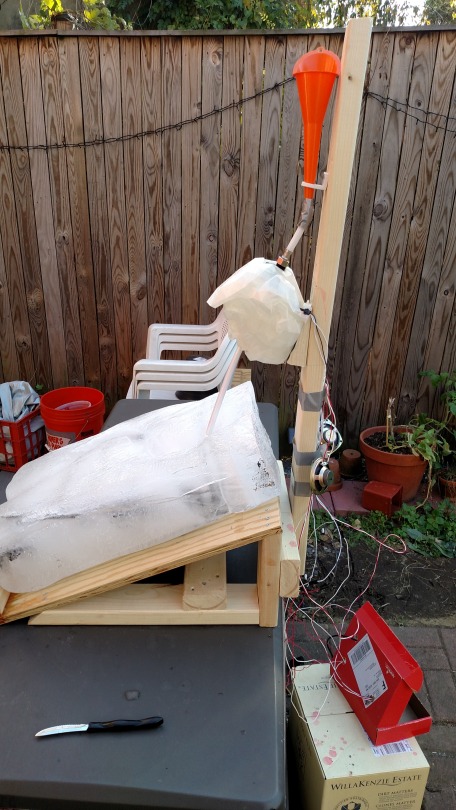
as well. Once you have that together, just put the tubes in the hole. You can then mount it on a block of wood. I found that the default angle for the head wasn’t quite right in my setup so I mounted the head on an angled block of wood.
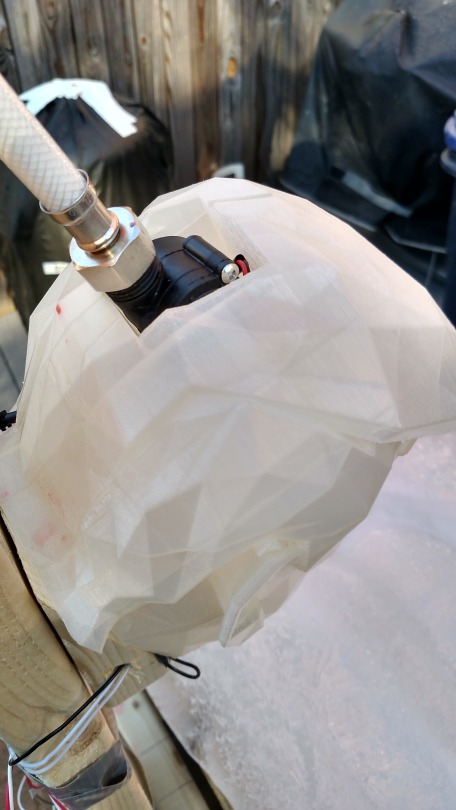
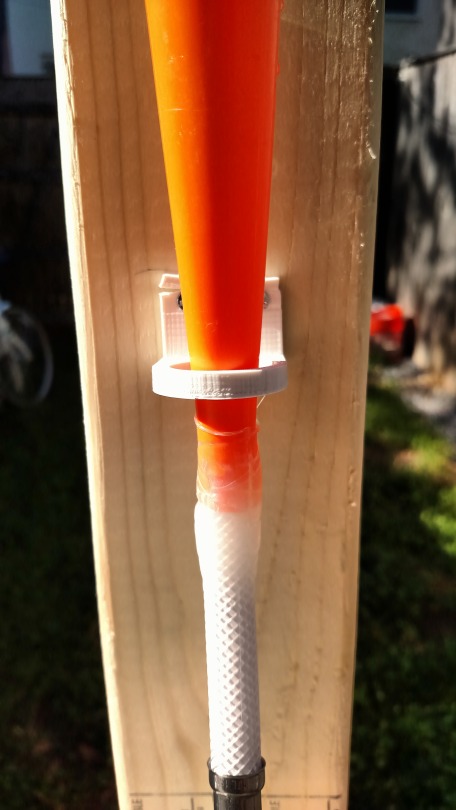
Finally, you will probably want to mount the tube and funnel. I designed a clip to hold it in place. The file is on the github page.
Once it is all wired up, you just have to mount it onto the rack. Assuming you did the wiring correctly it should be fairly straightforward. Here’s what it looks like:
I found that even at a pretty loud volume the speakers weren’t quite loud enough for a party full of people. About half way through I just plugged it into an amp with speakers. Fortunately there is a headphone out on the MP3 shield so that was super easy.
Oh, and here’s what it looks likes: